This tutorial walks you through your first session with
ClassiPyR.
Before You Begin
Make sure you have:
- The package installed (see Installation)
- Your local IFCB image source: ROI/ADC/HDR files or extracted PNG sample folders — or a remote IFCB Dashboard URL (see Dashboard Mode below)
- Optionally: a class list file (.mat or .txt) - you can also create one from scratch in the app
- Optionally: existing classifications (CSV, H5, or classifier MAT files, see below) to start from classified results — or use Live Prediction to classify on the fly
- Optionally: existing annotations can be imported into SQLite via Settings > Import .mat → SQLite or Import PNG → SQLite
Python Requirements
Python is not required for the default workflow. ClassiPyR stores annotations in a local SQLite database that works out of the box with no external dependencies.
Python is only needed if you want to export annotations as MATLAB
.mat files for use with ifcb-analysis.
Reading existing .mat files (annotations, classifier
output, class lists) also does not require Python.
CSV Classification Format
If you have existing classifications in CSV format, each file must be
named after its sample (e.g., D20230101T120000_IFCB134.csv)
and contain at least these columns:
file_name,class_name
D20230101T120000_IFCB134_00001.png,Diatom
D20230101T120000_IFCB134_00002.png,Ciliate
An optional score column (confidence values between 0
and 1) can also be included. HDF5 (.h5) and MATLAB
(.mat) classifier output files from iRfcb are also
supported. See the User Guide for more
details.
Python Setup (optional)
Only needed if you plan to export .mat files. Skip this
step if using the default SQLite storage.
library(iRfcb)
ifcb_py_install()  # Creates venv at ~/.virtualenvs/iRfcb by default
Step 1: Configure Settings
Launch the app:
library(ClassiPyR)
run_app()

# Or specify a custom Python virtual environment path (takes priority over saved settings)
run_app(venv_path = "./venv")
Click the gear icon next to your username in the sidebar.
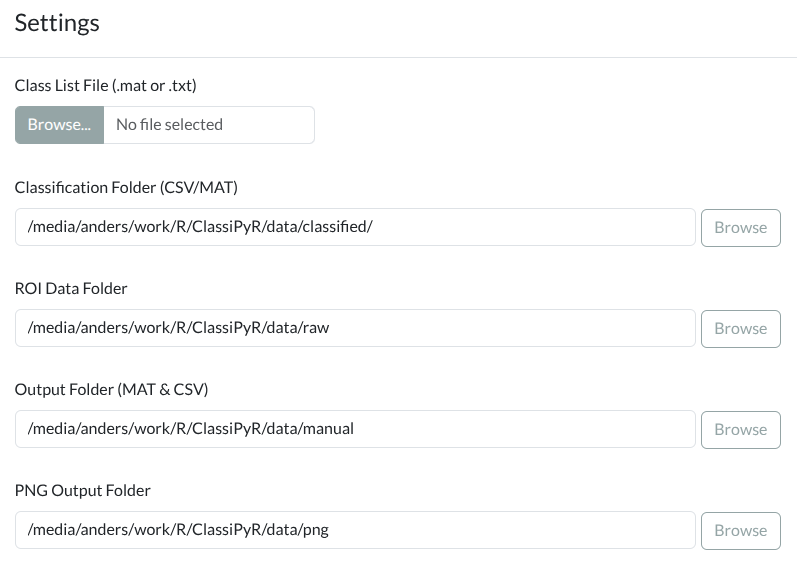
Settings dialog showing folder paths, classification threshold toggle, annotation storage, and import/export options. Click to enlarge.
Configure your folders using the built-in folder browser:
| Setting | Description | Example |
|---|---|---|
| Classification Folder | Where your CSV/H5/MAT classifications are | /ifcb/classified/ |
| ROI/PNG Data Folder | IFCB raw files or extracted PNG sample folders | /ifcb/raw/ |
| Output Folder | Where MAT files and statistics go | /ifcb/manual/ |
| Database Folder | Where the SQLite database is stored (must be local) | auto-detected |
| PNG Output Folder | Where images will be organized by class | /ifcb/png/ |
Network drives: The Output Folder can safely reside on a network share (e.g., for MAT files and statistics). However, the Database Folder must be on a local drive because SQLite is not safe on network filesystems. The default database location is a local user-level directory that works out of the box.
Click Save Settings. The app will scan your folders and build a file index cache for fast loading.
Note: The Python virtual environment path is configured via
run_app(venv_path = ...)and remembered for future sessions. See the FAQ for details on how the path is resolved.
Step 2: Set Up Your Class List
You have two options for setting up your class list:
Option A: Load an Existing Class List
If you have an existing class list file:
- In Settings, click Browse next to “Class List File”
- Select your
.mator.txtfile - The app will confirm how many classes were loaded
Option B: Create a Class List from Scratch
If you’re starting a new project without a class list:
- Click Edit Class List in Settings (no need to upload a file first)
- Add classes using one of these methods:
- Type a class name in “Add new class” field and click Add to End
- Type or paste multiple classes (one per line) in the text area and click Apply Changes
- The app will create a temporary class list automatically
- Important: Click Save as .mat or Save as .txt to save your class list for future sessions
Tip: You can start annotating immediately after creating classes - the app handles the temporary file automatically.
Step 3: Select a Sample
Choose a Year from the dropdown.
Optionally filter by Month.
Select Show:
- All samples: See everything
- Auto-classified (validation): Samples with existing auto-classifications
- Manually annotated: Samples you’ve previously annotated
- Unannotated: New samples (annotation from scratch)
Choose a sample from the dropdown:
- ✎ = Has manual annotation
- ✓ = Has auto-classification
- ✎✓ = Has both (can switch between modes)
- * = Unannotated (new sample)
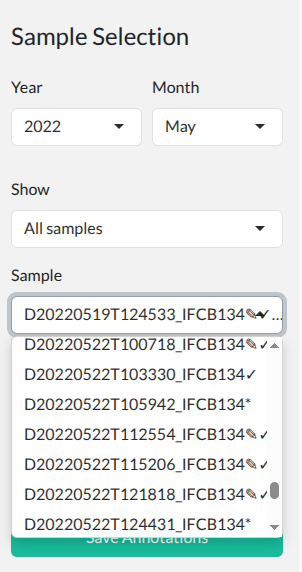
Sample browser with year/month filters. Click to enlarge.
Click Load.
Tip: If your sample list seems out of date, click the Sync button (circular arrow icon) next to the navigation buttons to rescan your folders.
Tip: Any sample with auto-classifications (✓ or ✎✓) shows a toggle in the header to switch between validation and annotation mode.
Step 4: Review Images
Once loaded, you’ll see the Image Gallery:
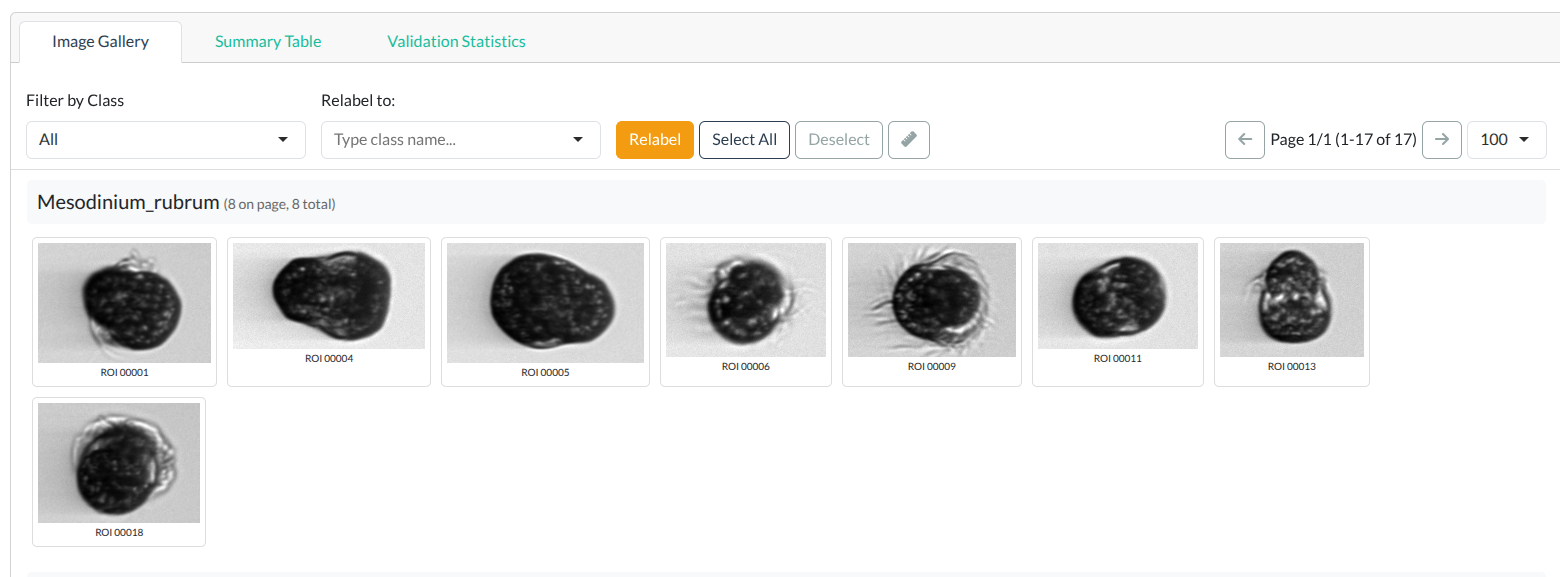
Image gallery showing classified plankton images grouped by class. Click to enlarge.
- Images are grouped by class
- Each image shows its ROI number
- Relabeled images have yellow borders
- Classification scores are shown (if available)
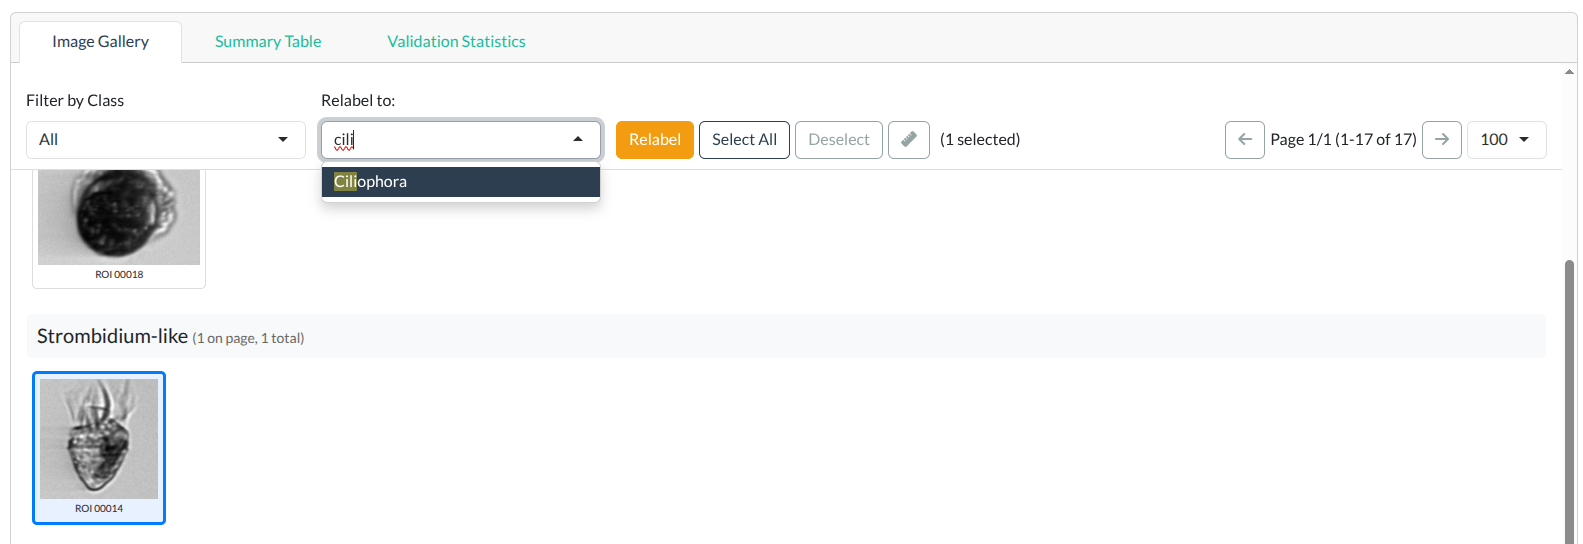
Step 5: Make Annotations
Selecting Images
Single click: Select/deselect one image
Drag select:
- Click and hold in an empty area
- Drag to create a selection box
- All images in the box are selected
Batch select:
- Select Page (first click): Select all images on the current page
- Select All (second click): Select all images across all pages
- Deselect: Clear selection
Step 6: Save Your Work
Click Save Annotations to save:
-
SQLite database (default) - annotations are written
to
annotations.sqlitein your Database Folder. This single file stores annotations for all samples. No Python needed. - Statistics CSV with accuracy metrics
- PNGs organized by class
You can change the storage format in Settings > Annotation Storage:
- SQLite (recommended) - works out of the box
- MAT file - for ifcb-analysis compatibility (requires Python)
-
Both - writes to both SQLite and
.mat
Tips for Efficient Annotation
Start with large classes - Use “Filter by Class” to focus on abundant taxa
Use drag-select - Much faster than clicking individual images
Sort by width - Images are sorted by width (x-dimension), grouping similar organisms
Check statistics - The “Validation Statistics” tab shows your progress
Use Live Prediction - For unannotated samples, use the Predict button to get CNN classifications as a starting point, then correct mistakes manually
Dashboard Mode
If your IFCB data is hosted on a remote Dashboard (e.g. habon-ifcb.whoi.edu), you can work directly with the Dashboard without downloading data locally:
- Open Settings (gear icon)
- Under Data Source, select IFCB Dashboard
- Enter the Dashboard URL, e.g.:
-
https://habon-ifcb.whoi.edu/timeline?dataset=tangosund(specific dataset — recommended) -
https://habon-ifcb.whoi.edu/(all datasets)
-
- Optionally check Use dashboard auto-classifications to load the dashboard’s automated classifications for validation
- Optionally set a Classification Folder to use local CSV/H5/MAT files instead of (or as fallback to) dashboard auto-classifications
- Click Save Settings
The app will fetch the sample list from the Dashboard API. When you load a sample, PNG images are downloaded on demand and cached locally for fast subsequent access. ADC files (for image dimensions and MAT export) are also downloaded as needed. Download parameters (parallel downloads, timeout, retries) can be tuned via the Advanced Download Settings section.
Tip: For large Dashboard instances with many datasets, always include
?dataset=in the URL to filter to a specific dataset. Loading all samples from a large dashboard (e.g., 900,000+ samples) will be very slow.
Note: MAT file export in dashboard mode requires downloading the ADC file for each sample. If the download fails, the app falls back to SQLite-only saving.
Reviewing Annotations Across Samples
Once you have annotated several samples, you can use Class Review mode to verify annotations across the entire database. Switch to Class Review in the sidebar, use the searchable class dropdown to find a class (each class shows its image count), and load all images annotated as that class. Image labels show the full name (sample + ROI) so you can identify which sample each image belongs to. This makes it easy to spot and fix misclassifications. See the User Guide for details.
Next Steps
- User Guide - Complete feature documentation
- Class List Management - Managing class lists for ifcb-analysis
- FAQ & Troubleshooting - Common issues and solutions